Sonntag, 29. April 2018

Geburtstagsgeschenke

Wir hatten etwas zu feiern - einen 18. Geburtstag :-) Und nun kann ich euch endlich zeigen, was ich während unseres "To be a bee-Patchwork Retreats" - also unseres Nähwochenendes in Randersacker - genäht habe:

We had to celebrate a special Birthday around here - my daughter turned 18 :-) And so I can finally show you what I finished during our "To be a bee" patchwork retreat two weeks ago:


Dieses Flamingo-Kissen stand nicht mehr aktuell auf der Wunschliste meiner Tochter. Aber im letzten Jahr, als ich ihr ein Ananaskissen genäht hatte und dann die Flamingos so hipp waren, hat sie mal gesagt, dass ein schwarz-weißes Flamingokissen sicherlich auch total super wäre. Das habe ich mir natürlich gemerkt :-) und mir gleich das "Geometrical Flamingo" Pattern von Kristy aka quietplay besorgt. Ich hatte zwar wegen der filigranen Teile ein bisschen Sorge - es sieht ja nicht so schön aus, wenn der Flamingo einen Bruch im Bein hat... Aber das hat alles super geklappt. Damit er nicht so hilflos auf dem Kissen wirkt, habe ich noch eine hellgraue Biese eingearbeitet. Zum Glück konnte Verena mir da mit einem Stoff aushelfen. Und zu guter Letzt kam außen noch ein weißer Rand mit einem wundervollen Ananasprint dran. Das ist somit die perfekte Verbindung zu dem Ananaskissen :-)

This flamingo pillow wasn't really on her wishlist. But when I made a pineapple pillow for her last year and flamingos became really hip at that time, my daughter said, that a black and white flamingo pillow would be awesome too. Well, of course I kept that in mind and immediately bought the "Geometric flamingo" pattern by Kristy aka quietplay. I was a bit afraid of all the tiny pieces especially regarding the legs - but it turned out wonderful! I sewed a tiny grey frame around my flamingo and now he doesn't look "lost" on the pillow. Fortunately Verena had some fitting grey fabric with her :-) The outer white border is made with a white on white pineapple print - and thus it looks even more perfect beside the pineapple pillow :-)


Dann hatte ich vor, eine Market Bag mit einem supersüßen Sommerstoff zu nähen - als Badetasche für die anstehenden Nachmittage am See. Aber als ich den Stoff heimgeschleppt habe und voll begeistert gezeigt habe, war die Resonanz nicht so, wie ich sie mir erhofft hatte. Zumindest nicht bei der großen Tochter... :-) Auf alle Fälle habe ich dann vorsichtshalber direkt nachgefragt und bekam prompt die Antwort, dass sie das wohl eher nicht so sehr brauchen würde. Aber - ein Turnbeutel mit silbernem Kunstleder, wie er als Modell bei Quilt Et Textilkunst hängt, der könnte ihr schon gefallen... Also bin ich wieder los und habe silbernes Kunstleder, einen passenden grauen Stoff, Kordel und Gurtband gekauft und mich meinem Schicksal ergeben. Turnbeutel nähen ist nicht so meine Lieblingsbeschäftigung. Oder anders gesagt: Ich wollte ihr etwas Besonderes nähen. Und nicht nur einen Turnbeutel... Aber meine "To be a bee" Kolleginnen Andrea und Ulrike haben dann dafür gesorgt, dass das nicht "nur" ein Turnbeutel wurde :-) Sondern ein High Fashion Turnbeutel :-)))

I also wanted to sew a Market Bag for my daughter. I thought she might use it for the afternoons at the lake which will certainly come now. I bought a fabric with a lovely summer print on it and took it home with me but when I showed it enthusiastically  to my family the reaction wasn't as I expected it... Finally I asked my daughter - although it wouldn't be a surprise anymore - and she told me, that a Market Bag wasn't really her favorite. But a drawstring bag such as the one she saw at Quilt Et Textilkunst in Munich would be lovely... So I went back to the shop, bought some artificial leather in glittering silver, some fitting fabric and a cord and surrendered to my fate. Sewing drawstring bags is not my favorite thing - at least not in this case. I wanted to make something special - and not only a drawstring bag... But my bee mates Andrea and Ulrike showed me how to turn the normal drawstring bag into a high fashion one :-)))


Denn ich war schon fast fertig, da kam Andrea mit einem Beutel an, den sie seit Jahren in Benutzung hat. Mit Innentasche, Schlüsselband und abgenähtem Boden. Und obwohl ich mich eigentlich darauf gefreut hatte, jetzt dann endlich etwas anderes nähen zu können, habe ich mich noch einmal ans Werk gemacht und den Turnbeutel meiner Tochter "aufgepimpt" - so sieht er innen jetzt aus:

I was almost done when Andrea showed me her bag with a zipper pocket, a keychain and a nice bottom and I took her advice and beautified my bag:


Und die abgenähten Ecken haben auch was:

The bottom is so much nicer with the corners:


Sie ist sehr glücklich damit und ich schätze mal, dass das gute Stück sie bei ihrem Interrail-Trip nach dem Abi begleiten wird. Ob er das dann überlebt ist die andere Frage - aber ich habe noch Kunstleder über, dann nähe ich halt nochmal einen... ;-)

My daughter is very happy and I am sure she will take this bag along with her when doing an Interrail trip after her final school exams. I hope the drawstring bag will survive the trip... if not, I have some artificial leather left and might sew a new one... :-)

Als nächstes hatte ich ein Kinderkissen für das Baby eines Arbeitskollegen meines Mannes auf der To-sew-Liste. Aber ich hatte so gar keine Lust darauf. Viel lieber wollte ich mal etwas für mich nähen. Zum Glück hatte ich eines meiner Lieblingsbücher - "Stitched Sewing Organizers" - mit dabei und mit noch mehr Glück konnte ich bei meinen Bee-Mädels die fehlenden Materialien für ein "Fold Up Sewing Folio" organisieren. Danke an Verena für den wundervollen Stoff und an Ulrike für Reißverschluss und Zipper! Und los ging's:

The next thing on my to-sew-list was a baby pillow for the newborn son of a colleague of my husband. But in fact I wanted to sew something for myself after sewing two presents for my daughter. And not another present... Since I took one of my favorite books with me - "Stitched Sewing Organizers" - I decided to sew a "Fold up sewing folio". Fortunately my bee mates were able to help me with some supplies I didn't bring with me and so I could start:


Am Ende unseres Retreats war das Täschchen tatsächlich komplett fertig. Abgesteppt, die Wendeöffnung von Hand verschlossen und für das Foto auch gleich mal befüllt:

And just in time before we had to leave again I was able to finish my folio completely. I even buried all the threads and cut off remaining threads. Yeah!


Daran werde ich sicherlich viel Freude haben. Es ist gut zu nähen und ein richtig sinnvolles Täschchen. Perfekt!

I'm sure I'll have a lot of fun with this bag. And it is such a wonderful pattern - perfect!

Daheim durfte ich mich nun noch künstlerisch in einer ganz anderen Richtung bewegen: ein ordentlicher Geburtstagskuchen musste her... Nicht wirklich meine bevorzugte Tätigkeit. Aber was tut man nicht alles, wenn so ein besonderer Geburtstag gefeiert wird? Meine anderen beiden Kinder haben fleißig gebacken, ich habe derweil aus Fondant Rosen geformt, Herzstecker gebastelt und spät in der Nacht noch den Kuchen dekoriert. Schon ein bisschen kitschig und überladen - aber das "Kind" hat sich gefreut :-) Am meisten wohl über die Sternspucker-Kerzen... :-)


Oder doch die Heliumballons?


Egal - es war ein gelungener Tag für sie und mich sieht man in nächster Zeit wohl öfter mit dem Fahrrad fahren. Denn das Töchterchen hat sich den Wagen gleich mal ausgeliehen...

Dienstag, 24. April 2018

Projekttaschen

Projekttaschen finde ich toll - da kann man seine Sachen reinmachen und gleichzeitig aber auch immer alles sehen. Komischerweise hatte ich bisher selbst keines... Aber im letzten Jahr habe ich meine erste Projekttasche genäht und an meine Bee-Kollegin Alex zum Geburtstag verschenkt. Überhaupt hat jede aus unserer To be a bee-Gruppe ein kleines Geschenk von mir zum Geburtstag bekommen. Nur in diesem Jahr habe ich das irgendwie gar nicht hinbekommen. Da nun aber unser Bee-Treffen in Randersacker anstand war es Zeit, dass ich mir über die Geburtstagsgeschenkfrage Gedanken machte. Und der Entschluss war schnell gefasst - Projekttaschen sollten es werden.

I love project bags using vinyl - you can put your belongings in there and have a look at them while they are safely stored. Funny that I didn't own one... Last year I finished my first project bag and gave it as a Birthday present to my bee mate Alex. All of my bee mates from the German speaking bee group "To be a bee" got a little Birthday present from me. At least last year. This year I didn't have the time. But now our bee meeting - aka "patchwork retreat" - was due and I decided to finally finish some late Birthday gifts and to take them with me. I decided on project bags.

Zunächst mal ein Probeexemplar nur für mich :-) Dafür habe ich mir ein Mini Charm Pack mit den wundervollen Stoffen aus der Serie "Hello, my friend" von Sandy Gervais vorgenommen und einfach mal losgelegt:

At first I made a test version for myself :-) Using a mini charm pack with the lovely fabrics from Sandy Gervais' collection "Hello my friend":


Ja, damit war ich sehr zufrieden :-) Und dann wollte ich mit den Geburtstagsgeschenken anfangen. Ein Blick in meinen Kalender hat mich fast verzweifeln lassen - denn bis zu unserem Bee-Treffen Mitte April hatten von insgesamt zwölf Mädels aus der Gruppe bereits sieben (!!!) Geburtstag! Wie sollte ich das denn noch schaffen???
Aber für jedes Problem gibt es eine Lösung :-) Alex hat ja im letzten Jahr schon eine Projekttasche bekommen und hat deshalb diesmal einen Thread Catcher erhalten. Die habe ich immer schon vorrätig :-) Eine andere hat schon ein anderes Geschenk bekommen - also blieben "nur" noch fünf. Kein weiteres Zögern mehr, in die Hände gespuckt und los:

Well, I was very happy (and still am!) But when I wanted to start with the Birthday gift production I almost drove crazy: Looking at my calendar I recognized, that already seven out of twelve ladies celebrated their Birthday within the first three and a half months of this year! Seven!!! I wasn't able to sew seven bags!!! O my... 
But there's a solution for every problem and I somehow managed to reduce the number to five (one already got another gift from me and one - as mentioned above - already got a project bag last year. So I gave her a thread catcher and I always have some on stock...) So five... well, that was still a lot but manageable...


Ich sage es ganz ehrlich - am Schlimmsten war es immer, den Stoff auszusuchen. Das Nähen selbst geht eigentlich ganz flott :-)

As always, choosing the fabrics was the most time-consuming part of the whole procedure...

Das grau-pinke Täschchen ist für Sabine, die bei Instagram ja "_justalittlecolor" heißt. Die beiden hinteren mit Tula-Stoffen sind für Eva (die ein erklärter Tula-Fan ist) und Iva. Das blaue Täschchen ist für Verena - dafür habe ich Stoffe gewählt, die ich mal bei ihr gekauft habe :-) Und das grüne Täschchen im Vordergrund ist jetzt bei Andrea im hohen Norden.

The one in pink and grey is for Sabine (whose name is "_justalittlecolor" on Instagram), the ones with the Tula fabrics are for Eva (who is addicted to Tula fabrics) and for Iva. The blue one is for Verena and I used fabrics I once bought at her shop. Last but not least - the green one went to the Northern part of Germany together with Andrea. 


Ich hoffe, dass die Mädels Freude damit haben. Ich selbst hatte so viel Freude, dass ich am vergangenen Dienstag im Tuesday Night Sew In mit meinen Damen auch gleich Projekttaschen genäht habe. Und ich finde, die haben das super gemacht:

I hope that the ladies have fun with their new project bags. I myself had so much fun sewing them that I decided to sew them in my monthly class. And I think, the ladies there did a great job:


Wenn Karlsruhe rum ist, dann werde ich mal ein Tutorial für diese einfachen Projekttaschen schreiben :-)

As soon as the patchwork fair in Karlsruhe is over I'll try to write a short tutorial for these :-)

Dienstag, 17. April 2018

Bee Creative Global

Gerade als wir mit unserem Round Robin Germany angefangen hatten, hat Alison mich über Instagram angeschrieben und gefragt, ob ich nicht Lust hätte, an einem internationalen Round Robin teilzunehmen. Und natürlich konnte ich nicht "Nein" sagen :-) Vom Prinzip her läuft das so, wie bei unserer deutschen Version: Jede sucht sich ein Thema und eine Farbvorgabe für ihren Quilt, näht einen Zentrums- oder Anfangsblock und schickt das Ganze - zusammen mit einem Begleitbuch, in dem alle wichtigen Infos stehen - an die nächste. Bei dem internationalen Round Robin ist die Zeitspanne, bis wann man alles weiterschicken muss, allerdings deutlich größer. Denn wenn ein Päckchen über den großen Teich geschickt wird, dann dauert das alleine ein paar Tage...

Right after we started our Round Robin Germany 2018 Alison asked me via Instagram to be part in an international round robin project too. And of course I couldn't resist... It works exactly the same way as our German group: Every participant chooses a theme for her quilt, sews the center block and sends it - together with a little booklet containing all the necessary information (likes, dislikes...) to the next in line. We are shipping with a quarterly rotation and not monthly (as we do in our German group). But when sending from Germany to the US it might take seven to fourteen days and the recipient should have some time to work on it too - so it would be pretty stressful with a monthly rotation!

Ich habe wirklich lange überlegt, was ich machen soll. Anfangs hatte ich einen New York Beauty Quilt im Auge und wollte nur die Farben dafür vorgeben. Am Ende habe ich mich aber entschieden, selbst einen NYB Block zu nähen und mir von den anderen alle möglichen Blöcke mit einem runden Motiv zu wünschen - in meinen Farbvorgaben:

It took me some time to decide on a theme for my project. I thought about a NYB quilt and just wanted to ask for certain colors. But in the end I decided to sew a NYB block and ask the others to sew different blocks with a round shaped design in my colors:


Das Pattern ist mal wieder von Ula Lenz. Ich liebe ihre NYB Blöcke! Hier habe ich ausschließlich den Block Nr. 7 verwendet.

The pattern is from Ula Lenz - I love her NYB block patterns! The one I used for my centerblock is no 7.

Mein Block ist jetzt schon in Pennsylvania und T arbeitet daran. Anschließend geht es weiter in die Schweiz, England (zwei Stationen), Griechenland, die Schweiz, Frankreich und die USA. Dort gibt es ebenfalls zwei Stationen - das heißt, im Ganzen arbeiten acht Frauen an dem Projekt. Ich bin echt gespannt! Wenn ihr auch interessiert seid, dann schaut doch öfter mal unter dem Hashtag #beecreativeglobal bei Instagram :-)

My block is now in Pennsylvania and T is working on it. The other countries it'll go to are the UK, Greece, Switzerland and France. But there will be two stations in the UK and two in the US - we are eight women working in this international project. If you are interested in our project check it out under #beecreativeglobal on Instagram :-)

Ich habe auch schon das erste Päckchen erhalten - von Alison aus den USA. Sie wünscht sich einen Medaillon Quilt und dies ist ihr Anfangsblock:

I received the first package from Alison from the US. She is asking for a medaillon quilt and that's her center block:


Also, dann mache ich jetzt mal Pläne dafür :-)

Okay, so I'll start to make plans for it now :-)

Ich weiß... einige von euch warten vielleicht auf meinen Bericht vom Bee Wochenende in Randersacker, das ich gerade mit meiner To be a Bee-Gruppe verbracht habe. Leider müsst ihr da noch ein bisschen warten, denn die Sachen, die ich dort genäht habe, kann ich noch nicht zeigen. Ich will sie verschenken und das dauert noch ein paar Tage. Aber dann... versprochen :-)

I know, some of you expected a report about the wonderful patchwork retreat I had last weekend together with my bee mates from the German To be a bee-group. Unfortunately I can't show yet what I made there. You have to wait a couple of days until I can gift the things. But then I will tell you how awesome it was :-)))

Donnerstag, 5. April 2018

Der Delightful Desert Quilt

Ich bin hier irgendwie ein bisschen hinterher mit dem Posten... Und dabei habe ich letzte Woche doch einen kleinen Quilt fertig bekommen. Den Delightful Desert Miniquilt nach er Anleitung von Elizabeth Hartman:

I'm a little lazy regarding blogging at the moment... and somehow didn't yet show the little mini quilt I finished last week. The Delightful Desert quilt using the pattern from Elizabeth Hartman:


Diesen Quilt habe ich in allen möglichen Ausführungen im Herbst beim Quilt Market in Houston gesehen. In riesig, in groß und in klein. In den warmen Farbtönen ihrer neuen Stoffserie "Terrarium", in den kühlen Farbtönen und mit einem Mix von beiden. Einfach alle wunderschön. Und mir war klar, dass ich auch so einen Quilt nähen muss ;-) Deshalb habe ich die FQ-Packungen der neuen Stoffserie gleich in den USA erstanden

I saw this quilt at Quilt Market last year in Houston. I saw it in the large version with the cool and the warm colorway of Elizabeth Hartman's new fabric line "Terrarium", I saw it in a smaller version using only the warm colors and I saw it as a mini quilt in the cool color version. They all were so beautiful and I knew I had to sew such a quilt. That's why I brought the FQ bundles with me 


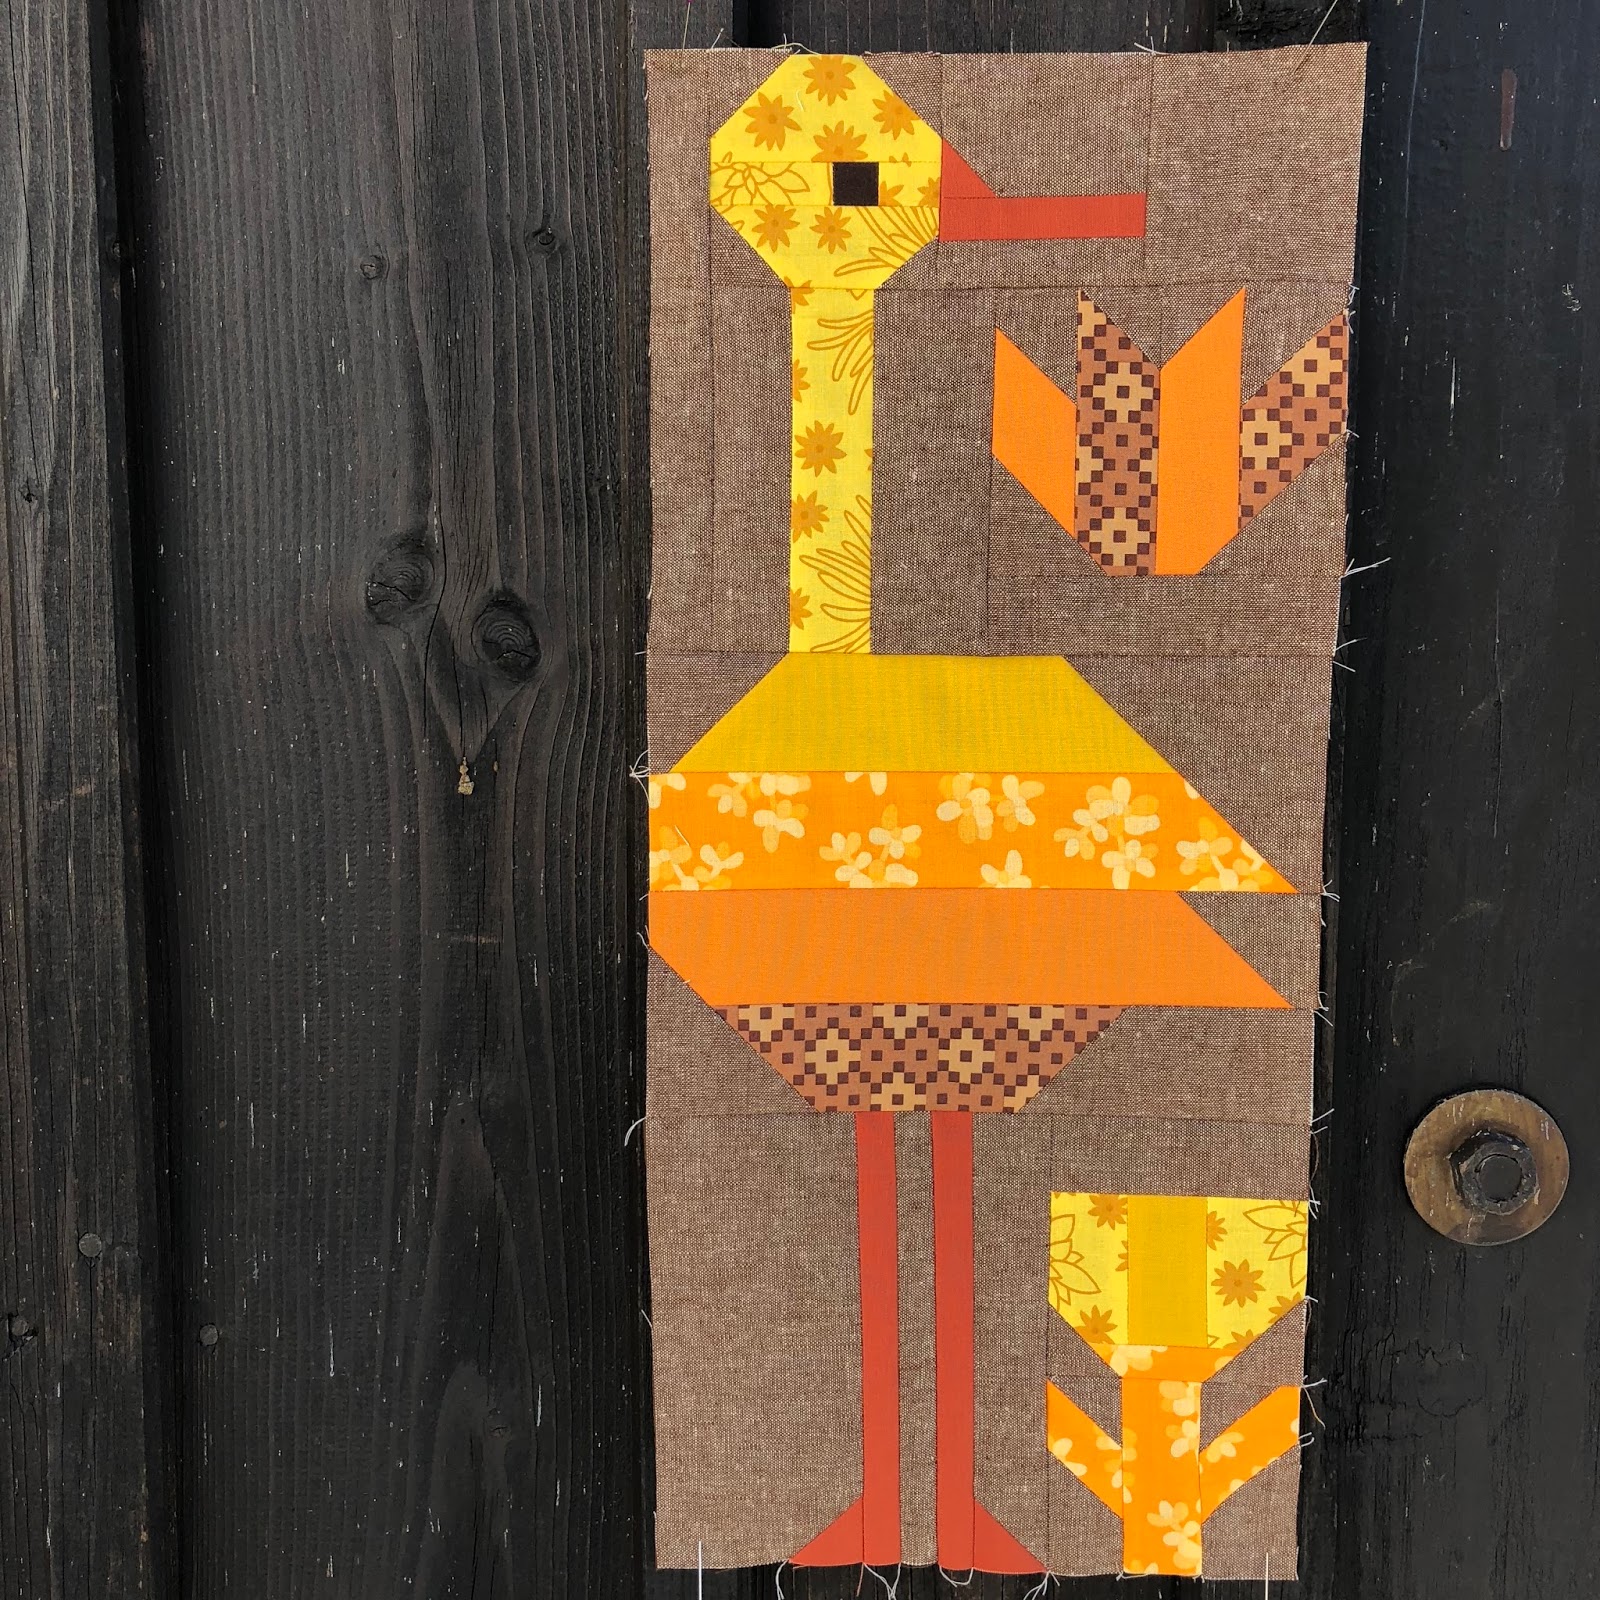
und - sobald der wunderschöne Hintergrundstoff dazu in den Laden kam - losgelegt. Und zwar bei unserem Nähwochenende am Chiemsee. Da habe ich nämlich den ersten Block genäht, Coco Crane:

and started this project as soon as the background fabric (Essex Linen Yarn Dyed) arrived at the store. I took it all with me to my patchwork retreat in March and started with the first block - Coco Crane:


Weiter ging es dann daheim. Wenn man mal alle Stoffe zugeschnitten hat, dann geht das mit dem Nähen ganz flott. Und ganz gegen meine Gewohnheit habe ich das mit dem Zuschneiden diesmal auch sehr ordentlich und gut organisiert im Vorfeld gemacht :-)

Back home I cut all the pieces for the other blocks. Sewing was pretty easy then. I felt really organized :-)


Ricky Ringtail und Jade

Millie Moth und Freya Fawn

Pamela Puma

Carlos Coyote und Aloe

Cottontail
Ich habe mich über jeden einzelnen Block gefreut. Das hat richtig Spaß gemacht :-) Aber es war auch klar, dass ich keinen großen Quilt nähen würde. Erstens hat sich in meiner Familie niemand gefunden, der so einen Quilt jetzt gerne gehabt hätte - irgendwie sind meine Kinder für diese süßen Tiermotive anscheinend schon zu groß... Und zweitens finde ich es toll, jeden Block einmal zu nähen - aber neunmal, wie ich es für einen großen Quilt brauchen würde? Nein, das dann doch nicht :-)

I had fun sewing each of the blocks but I also knew, that I wouldn't make a large quilt. No one in my family asked for such a quilt - I think, the kids are already too "old" for such cute animal blocks... And I didn't want to make every block nine times. No - a small quilt was enough for me :-)

Mit den paar wenigen Blöcken ging es auch ganz flott, den Quilt fertig zu machen. Ein bisschen quilten, ein helles Binding drum und fertig.


Jetzt hängt er gerade im Laden bei Quilt & Textilkunst in München. Und wenn ich ihn wieder heimhole, dann hänge ich ihn entweder ein bisschen in mein Nähzimmer oder er wird als Babyquilt verschenkt. Mal sehen :-)

The quilttop was finished pretty fast and quilting such a small quilt also didn't take too long. The quilt is now on display at Quilt & Textilkunst in Munich and after that, I'll hang it into my sewing room. Or it will become a baby quilt one day...

Donnerstag, 29. März 2018

Swiss Beauty BOM

Anfang des Jahres hat die Modern Patchquilt Gruppe aus der Schweiz - zu der auch "unsere" Iva aus der "To be a bee" Gruppe gehört - angekündigt, dass sie ein Block des Monats-Projekt starten: Den Swiss Beauty BOM. Wer kann da widerstehen? Ich nicht :-)

At the beginning of the year the Swiss group Modern Patchquilt started a new BOM project - the Swiss Beauty BOM. And I couldn't resist...

Ich habe einfach ein bisschen in meinen Stoffkisten gewühlt und mich dann für die Farbkombination Orange und Pink entschieden. Der erste Block ging gut zu nähen und weil ich im Januar eh in die Schweiz gefahren bin, habe ich den Block kurzerhand eingepackt, um ein Foto in "heimischer" Umgebung zu machen:

I went through my stash and decided on a color combination of pink and orange. The block was good to sew and since I went to Switzerland in January I took it with me to take a picture in it's home surroundings :-) In front of the Matterhorn :-)))

Vor dem Matterhorn in Zermatt
Der zweite Block sah komplizierter aus, ging aber auch super zu nähen. Und weil das im Januar so gut geklappt hat, habe ich den Februar Block auch mit in den Urlaub genommen...

The second block looked more complicated but in fact wasn't. And since I had so much fun taking the pics in Switzerland I took block no 2 with me to Iceland in February...

Vorm Geysir
Am Gullfoss Wasserfall
Nun ist der März schon fast rum und ich habe den dritten Block genäht. Ich weiß, Ihr erwartet jetzt alle, dass ich immer schöne Auslandsfotos mache :-) Ich werde mir Mühe geben, aber obwohl ich viel und gerne reise, ist es wohl doch nicht so, dass ich jeden Monat irgendwo unterwegs bin... Zu doof aber auch... Naja, dieses Foto ist jetzt mal im heimischen Garten entstanden:

Now March is almost gone and I finished the third block. I know, you're expecting lovely pictures from somewhere exotic :-))) Well, although I love traveling and do it whenever possible, I'm definitely not traveling every month... I'll do my best - promised. But this time the pictures were taken in my garden:


Kleine Schmunzelgeschichte am Rande? Als ich Block Nummer 2 fertig hatte, habe ich ihn unter Block Nr. 1 an die Designwand gehängt. Und Block Nummer 1 war deutlich größer, als Block 2... Hm... Also habe ich den zweiten Block nachgemessen, alles hat gestimmt. Dann habe ich die Anleitung für den ersten Block gesucht und intensiv nachgelesen. Und tatsächlich, da stand er, dieser kleine Satz "Alle 16 Teile auf 3,5" x 3,5" zurückschneiden". Diesen Schritt habe ich doch glatt ausgelassen... Da blieben nur zwei Möglichkeiten. Zum Nahttrenner greifen und den ganzen Block wieder auseinandernehmen oder gleich alles neu nähen. Mein Sohn hatte dann die geniale Idee, dass ich doch einfach entlang der Nähte alles aufschneiden könne - groß genug wären meine Blöcke ja dann noch. Nun, das habe ich versucht. War aber nur begrenzt praktikabel, da aufgrund der Mitteldiagonalen - die ja auch im neuen Block noch ordentlich in der Mitte sein sollte - das mit dem Trimmen des Blocks dann manchmal etwas knapp war. Also habe ich auch noch zum Nahttrenner gegriffen:

A little funny story about all that? Well, when I finished block no 2 I hang it to the first one on my designwall and recognized, that it was way smaller. How comes? I measured twice but everything was fine regarding block no 2. So I took the instruction for block no 1 and reread it. And there it was. This little sentence, saying, that you should trim each of the 16 block unites to 3,5"... Well, I didn't do that. Too bad. Seam ripper or sewing it all new? My son suggested, that I might cut it apart beneath the seams because my block units would still be large enough. I tried this, but it wasn't that easy because of the white part which still should be in the diagonal of the block... In the end it was a combination between cutting the rows apart and ripping the blocks within a row.


Und am Ende musste ich mein Instagram Foto bemühen, um die gleiche Anordnung wieder hinzubekommen. Tja, wer Anleitungen lesen kann ist klar im Vorteil... Und erspart sich das lästige Trennen. Aber jetzt ist alles gut :-)
Und ich freue mich schon auf den April Block!

Then I had to take a look at my Instagram picture in order to get the same arrangement of the blocks. Reading instructions properly is sometimes very helpful! And saves a lot of time... But in the end everything is fine :-) And I'm looking forward to April's block!

A propos BOM... Auch wir bei Quilt&Textilkunst starten demnächst anlässlich des 20jährigen Jubiläums ein Block des Monats Projekt. Interessiert? Dann informiert Euch auf der Website von Q&T. Die Blöcke sind entworfen von Ulrike, Ulli und mir und das Besondere daran ist, dass sie nicht das übliche quadratische Maß haben - nein, wir nähen im Rechteck :-))

We at Q&T in Munich are starting a BOM project too - because of our 20 year anniversary. Are you interested? You will get all the informations on the website of Q&T. The blocks were designed by my colleagues Ulrike, Ulli and myself and the special thing about it is, that we are sewing rectangular blocks :-)

Jetzt wünsche ich Euch erst einmal Frohe - und hoffentlich schneefreie - Ostern!

Have a Happy Easter - hopefully without snow!

Sonntag, 25. März 2018

Kate Spain Miniquilt

Was so geschah in letzter Zeit in meinem Nähzimmer? Nun, eigentlich eine ganze Menge :-) Ich bereite mich auf mein Bee-Treffen in Randersacker vor und habe ein Tausch-Objekt genäht. Aber das soll ja eine Überraschung sein. Wie so vieles andere auch, das ich deshalb hier nicht zeigen kann...

There's a lot going on here in my sewing room but unfortunately I can't show it right now... I'm working on our new BOM project and am preparing for our patchwork retreat in April - but it's all a surprise...

Aber einen kleinen Miniquilt habe ich in den letzten Tagen fertig gestellt. Mit den wunderschönen "Voyage" Stoffen von Kate Spain. Ich mag Kate Spain Stoffe ja sehr gerne - aber sie sind schon ein bisschen eigenwillig. Ich musste sie jedenfalls haben und habe erst dann überlegt, was ich eigentlich damit anfangen möchte. Am Ende wurde es ein Miniquilt, der jetzt im Moment bei Quilt & Textilkunst in München hängt:

But I finished a little quilt :-) with the wonderful "Voyage" fabrics by Kate Spain. I love her fabrics, although they are a little special. I had to buy them not knowing what to do with them :-) and in the end came up with this miniquilt which is now on display at my LQS:


Ich liebe es ja, ohne wirklichen Plan einfach mal loszulegen. Dafür habe ich mal unifarbene Streifen zwischen die bedruckten Stoffe genäht, mal außen an den bedruckten Stoff und mal gar nichts. Die bedruckten Streifen sind außerdem unterschiedlich groß. Daran kam der Hintergrundstoff und dann habe ich alles mit dem Dresden Plate Ruler zugeschnitten.

It's so much fun to start a new project without a pattern - just by intuition. I used some Kona Cotton solids and added them to the print fabrics. Another solid served as the background and was sewn to the end of my strips. Then I took my dresden plate ruler and cut the pieces:

Auf dem Foto kommen die Farben leider nicht so richtig raus... 

Und erst nachdem ich dreiviertel der benötigten Segmente hatte, habe ich mir Gedanken über die Anordnung und somit über eventuell noch fehlende und zu nähende Farbkombinationen gemacht. Da kann es dann schon mal passieren, dass man in den Ecken zu wenig Stoff hat... Aber das lässt sich ja zum Glück beheben. Unser Hobby heißt ja schließlich "Patchwork" - da darf man dann einfach noch ein Stückerl annähen :-)

When I had three quarters of the needed segments I finally started to think about the arrangement and about which colors or color combinations might still be needed or useful. And since we are doing "patchwork" it wasn't that bad that I had to add some more of the background fabric in the corners :-)


Gequiltet habe ich nur gerade Linien. Leider habe ich vergessen, den aufapplizierten Mittelkreis zuvor auf das Vlies zu bügeln - jetzt wellt es ihn ein bisschen. Aber egal - das kann man ein bisschen glattstreichen :-)

The quilting is only straight lines - maybe I will have to do some handquilting within the inner circle because I forgot to iron it onto the batting and now it is a bit crinkly... 

Als Binding habe ich wieder einen der schönen Kate Spain Stoffe verwendet, hinten einen Tunnel angenäht und jetzt hängt er erst einmal im Laden und dann irgendwann bei mir im Nähzimmer. Ich bin zufrieden damit :-)

I used one of the lovely Kate Spain prints for the binding. And I'm looking forward to the moment I can hang this mini into my sewing room :-)


Mittwoch, 14. März 2018

Nähwochenende am Chiemsee

Es ist einige Zeit vergangen, seit ich das letzte Mal hier gepostet habe. Die Erkältungswelle hat schließlich auch uns erwischt - obwohl wir bisher so gut durch den Winter gekommen sind... Los ging's mit Husten und dann kam das ganze Programm. Das Schlimmste war aber, dass ich so richtig k.o. war. Am liebsten bin ich nur am Sofa gelegen. An Nähen war gar nicht zu denken. Und das, wo mein Nähwochenende am Chiemsee bevorstand... Bis zuletzt wusste ich nicht, ob ich wirklich fahren kann. Ich wollte ja auch nicht unbedingt die anderen anstecken. Letztlich habe ich mich auf den Weg gemacht und wir waren eh ein halbes Lazarett. Durchgehalten habe ich allerdings nur mit Boxa Grippal und die sonst üblichen Late Night oder Early Morning Nähsessions gab es diesmal nicht - zumindest nicht für mich. Ich hatte auch kein Projekt, dass ich explizit für dieses Wochenende mitgenommen habe. Aber zum Nähen findet sich ja trotzdem genug. Und die Umgebung dort ist wie Balsam für die Seele...

It's been a while since I wrote here... But the flu finally caught us too. I felt really sick and just wanted to lie on the couch. The worst thing about all this was, that there was a sewing retreat with my patchwork group ahead and I really didn't think going there was a good idea. I didn't want to infect the others. But since I felt a bit better I went - together with a lot of medications. And I wasn't the only person with a cold! Fortunately :-) This time I didn't do the usual late night or early morning sewing sessions. Instead I went to bed early and slept in in the morning... And felt better and better :-) The good thing about such a weekend is, that you don't have to prepare lunch or dinner for the family. You can just sit down at the table and get healthy food. That's what a mum should do, when she is half-ill - go to a sewing weekend and relax :-)))) Not difficult in such a beautiful landscape...


Nicht viel denken muss ich mittlerweile bei meinen Pineapple Blöcken, die meine Bee-Mädels von der To be a bee-Gruppe auch für mich nähen. Da ich insgesamt 35 von diesen Blöcken brauche, muss ich selbst noch ein bisschen daran sitzen. Acht Vorlagen habe ich mir mitgenommen und die habe ich im Laufe des Wochenendes auch alle fertig genäht:

I don't have to think a lot when sewing my pineapple blocks and thus this was the perfect project for the weekend. I took eight patterns with me and finished all eight blocks. For a whole quilt I need 35 - my bee mates from the German speaking bee "To be a bee" are sewing some blocks for me but there are still a couple of them left for myself. 


Da hätte ich glatt noch mehr mitnehmen können...
Hier daheim trudeln auch immer mehr Bee-Blöcke ein, die letzten werde ich dann bei unserem jährlichen Bee Treffen in Randersacker bekommen. Und dann kann ich anfangen und das Top zusammennähen :-)

I could have finished more but ran out of patterns... Well, no problem, I still have some time left to finish this quilt. And my bee mates will give me the last missing blocks when we meet for our annual retreat in April. Then I'll be able to join the top.

Außerdem haben wir am Chiemsee unsere Blöcke für den Verlosungsquilt für die Quiltausstellung in Unterhaching - die in diesem Jahr übrigens etwas früher, nämlich am Wochenende 19. - 21.10., stattfinden wird - genäht. Einen kleinen Teaser gefällig? Unsere Blöcke sind inspiriert vom "Birch Tree" Quilt von Amanda Jean.

We also started with the blocks for our charity quilt for the exhibition of our group in Unterhaching - which will take place in October this year! Two weeks earlier than usually! Want to see a little teaser? Yes, it is inspired by the "Birch Tree" quilt by Amanda Jean


Mittlerweile ist das ganze Top fertig und ich muss sagen, das wird ein richtig schöner Quilt! Vielleicht muss ich mir auch einmal so einen nähen...

Meanwhile the top is finished and I have to admit I love it! I should make one for myself...

Trotz verkürzter Nähzeit und Mittagsschläfchen habe ich aber noch mehr geschafft an diesem Nähwochenende. Ich habe ein neues Projekt angefangen. Den "Delightful Desert" Quilt von Elizabeth Hartman. In den habe ich mich bei der Quiltmesse in Houston verliebt und die passenden Stoffe auch gleich dort erstanden. Den tollen Essex Linen Hintergrundstoff hat unsere Chefin auch für den Laden bestellt und somit konnte ich jetzt anfangen. Die Tiere sind nicht auf Papier genäht sondern mit sogenannten "Connector-Ecken". Viel Verschnitt, aber nicht schwer zu machen. Nur die Vorbereitung dauert, weil man unheimlich viele verschiedene Quadrate und Rechtecke zuschneiden muss und da auch schön sortieren und kennzeichnen muss - sonst verliert man total den Überblick...
Aber wenn man das mal hat, dann geht es eigentlich ganz flott :-)

Even if I wasn't as productive as usually on such a sewing retreat weekend, I not only finished my pineapple blocks but also started a new project: The "Delightful Desert" quilt by Elizabeth Hartman. I fell in love with it when I saw it at the Quiltmarket in Houston and immediately took the gorgeous fabrics with me. The wonderful background fabric is available at my LQS and so I could start with the first block. It's not difficult to sew but a lot of cutting. And you have to sign all the different pieces because otherwise you will get lost. But it is not difficult to sew!


In dieser traumhaften Umgebung kann man so schöne Fotos machen...

It's so much fun taking pictures in this wonderful surrounding! 

Das war es dann aber. Am Sonntag bin ich relativ früh wieder heimgefahren und habe dann die letzte Woche genutzt, um wieder richtig auf die Füsse zu kommen. Von jetzt an gibt es also hoffentlich wieder mehr zu sehen :-)

On Sunday I left early and it took me the last week to get fit again. But now I hope I'm able to sew and show more again!

Habt eine schöne Woche!

Have a great week!